A classic buttermilk pancake recipe with a little something-something extra special for the holidays!

These pancakes are as delicious as they are elegant, and they couldn't be easier to make. Sliced Seckel pears and some ground cinnamon and cardamom impart warm, seasonal notes. It’s all about technique, not torture, from mixing the batter properly to placing the sliced pears on both the buttered griddle and atop the poured pancakes. Serve with maple syrup. Better still: serve with cardamom maple syrup from BD Provisions for an even more delectable dish.
Equipment: cutting board; chefs knife; mixing bowl; dry measuring cup; wet measuring cup; measuring spoons; whisk; nonstick 10-inch sauté pan; cast iron skillet; or griddle; spatula Ingredients:
4 Seckel pears (or 2 Bosc pears)
1½ cups all-purpose flour 3 tablespoons sugar 2 teaspoons baking powder 1 teaspoon salt
½ teaspoon ground cinnamon
½ teaspoon ground cardamom 1¼ cups buttermilk (or whole milk)
3 tablespoons unsalted butter, melted 2 large eggs, beaten
1-2 tablespoons unsalted butter for cooking the pancakes
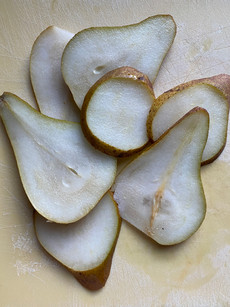
1. Slice the pears vertically into ¼-inch thick slices by slicing on either side of the core. Discard the core and set the pear slices aside.
ILOC tip: use pears that are early in their ripeness, still somewhat firm. You don't want a soft and mushy pear.
2. In a large bowl, whisk together the flour, sugar, baking powder, salt, and spices. Make a small well in the center of the bowl. Add the milk, melted butter, and beaten eggs. Gently whisk the wet and dry ingredients together, just until well combined, but not necessarily lump-free.
3. Preheat a griddle or a nonstick skillet over medium heat.
ILOC tip: be careful not to burn the butter. Typically we add butter to a cold pan, not a hot pan. Making pancakes and French toast is the notable exception.
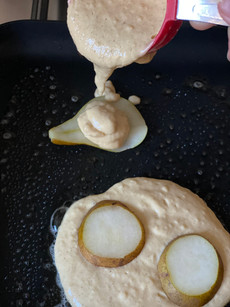
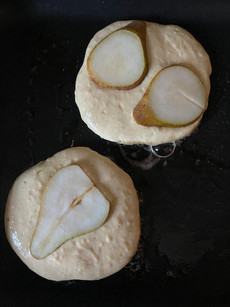
4. Place a small pat of butter on the cooking surface. The moment the butter foams, place 1-2 pear slices on the cooking surface per pancake and then, using a dry measuring cup, pour 1/3-cup batter over the pear slice. Top with another pear slice. Cook until the top of the pancake bubbles. Turn the pancake with a spatula and cook just until the underside is golden brown.
Makes about (8) 4-inch pancakes.
Batter Basics
Follow these ILOC tips and you will be successful every time. Remember: it's all about technique, not torture!
Do not overbeat the batter. Believe it or not, small lumps in pancake batter are not only acceptable; they are desirable because it indicates that the ingredients have been gently combined. The lumps settle as the batter sits and as the pancakes cook. When the batter is beaten too vigorously, the results may yield a flatter, thinner, and certainly tougher, less tender pancake.
Make sure the pan is hot. There are many ways to test a dry pan to see if it is ready for batter. The easiest method is to drop a few bits of water on the dry pan. If those drops bounce and sizzle, then the pan is ready. If the water sits still and holds its shape, the pan is too cool. In the event that the water evaporates the second it hits the pan, then the pan is most likely too hot in which case you should remove it from the heat, allow it to cool down, and begin again.
Don’t count on the first pancake. So many people experience that the first few pancakes do not come out as well as the rest. This usually has to do with the heat of the pan. We turn on the heat and expect it to be ready in just moments, but the truth is it can take several minutes for a pan to come to temperature, depending on its material and construction.
Use a measuring cup to pour the batter. To achieve the standard 5-inch size and an even circular shape, use a third-cup dry measure (silver dollars require a mere tablespoon of batter). Fill the measuring cup with batter and poor it onto the pan, just a few inches from the pan’s surface. Once you begin pouring the batter, keep your hand steady and do not move. This helps to make a fluffy pancake.
Turn a pancake just once. If you turn a pancake over and over, it can toughen. When the top of the pancake bubbles, it is ready to be turned with a spatula. Once turned, it will take only about half as long for the second side to cook.
Keep pancakes warm while you finish cooking. Preheat an oven to 200°F degrees before you begin cooking. As the pancakes come off the sauté pan or griddle, place them on a sheet pan in a single layer and hold them in the oven. They can be slightly overlapped if you are making too many to fit in a single layer.


